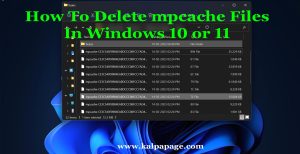
How To Delete mpcache Files In Windows 10 or 11
How To Delete mpcache Files In Windows 10 or 11
How To Delete mpcache Files In Windows 10 or 11
MPCACHE files are temporary files created by Windows Media Player on your computer. These files are used to enhance the performance of the application by storing frequently accessed files. However, over time, these files can accumulate and take up valuable disk space on your computer. In some cases, they may even cause problems with the operation of Windows Media Player. Deleting these files can free up space on your hard drive and resolve any issues that you may be experiencing.
In this article, we will discuss the steps to delete MPCACHE files in Windows 10/11.
Step 1: Stop Windows Media Player
Before you can delete the MPCACHE files, you must first stop Windows Media Player. This will ensure that the files are not currently in use, and you can safely delete them.
To stop Windows Media Player, follow these steps:
Press the Windows key + R on your keyboard to open the Run dialog box.
Type “services.msc” (without quotes) in the Run dialog box and press Enter.
In the Services window, scroll down to find “Windows Media Player Network Sharing Service.”
Right-click on this service and select “Stop.”
Step 2: Locate the MPCACHE Folder
The MPCACHE files are stored in a folder on your computer. To delete these files, you need to locate the MPCACHE folder.
To locate the MPCACHE folder, follow these steps:
Press the Windows key + R on your keyboard to open the Run dialog box.
Type “%LOCALAPPDATA%\Microsoft\Media Player” (without quotes) in the Run dialog box and press Enter.
This will open the MPCACHE folder.
Step 3: Delete the MPCACHE Files
Now that you have located the MPCACHE folder, you can safely delete the MPCACHE files.
To delete the MPCACHE files, follow these steps:
Press Ctrl + A on your keyboard to select all the files in the MPCACHE folder.
Right-click on any selected file and select “Delete.”
Click “Yes” to confirm that you want to permanently delete the files.
Step 4: Restart Windows Media Player
After deleting the MPCACHE files, you can restart Windows Media Player. This will allow the application to create new MPCACHE files as needed.
To restart Windows Media Player, follow these steps:
Press the Windows key + R on your keyboard to open the Run dialog box.
Type “services.msc” (without quotes) in the Run dialog box and press Enter.
In the Services window, scroll down to find “Windows Media Player Network Sharing Service.”
Right-click on this service and select “Start.”
Conclusion
In conclusion, deleting MPCACHE files in Windows 10/11 is a simple process that can help you free up valuable disk space and resolve any issues that you may be experiencing with Windows Media Player. By following the steps outlined in this article, you can safely delete these temporary files and ensure that your computer is running smoothly. It is important to note that deleting the MPCACHE files will not affect your media library or any other settings in Windows Media Player. 0 0 0.
How To Delete mpcache Files In Windows 10 or 11
How To Delete mpcache Files In Windows 10 or 11
FAQs on How To Delete mpcache Files In Windows 10/11
Q: What are mpcache files in Windows 10/11?
A: Mpcache files are temporary files used by the Windows operating system to speed up the installation and uninstallation of Windows updates.
Q: Why would I want to delete mpcache files?
A: Over time, mpcache files can accumulate and take up valuable disk space on your computer. Deleting them can free up disk space and potentially improve system performance.
Q: How do I locate mpcache files on my Windows 10/11 computer?
A: Mpcache files are located in the Windows\Installer folder. To locate them, open File Explorer and navigate to C:\Windows\Installer.
Q: Can I delete mpcache files manually?
A: It is not recommended to delete mpcache files manually, as doing so can cause issues with Windows updates and installations. Instead, use the built-in Disk Cleanup tool or a third-party disk cleanup utility to safely remove them.
Q: How do I use the Disk Cleanup tool to delete mpcache files?
A: To use the Disk Cleanup tool, go to Start menu > Windows Administrative Tools > Disk Cleanup. Once the tool opens, select the drive where Windows is installed and click “OK”. Check the box next to “Windows Update Cleanup” and click “OK” to delete mpcache files.
Q: Are there any third-party disk cleanup utilities that can delete mpcache files?
A: Yes, there are many third-party disk cleanup utilities available that can safely delete mpcache files, such as CCleaner, Wise Disk Cleaner, and BleachBit.
Q: Is it safe to delete all mpcache files?
A: Yes, it is safe to delete all mpcache files. However, be aware that doing so may cause Windows updates and installations to take longer to complete in the future. ***
How To Delete mpcache Files In Windows 10 or 11
You May Like:
- How To Play Sound In Headphone And Speaker at The Same Time
- Cannot Connect To Printer Sharing Error 0x000003e3 Fix
- Get Donations from Bill Gates
- Get Donations from Arabian Millionaires
- How to Get Donations from NGOs for Poor Children
Additional Searches:
- What is mpcache.exe
- How To Delete mpcache Files In Windows
- I Accidentally Deleted the Wireless Network Adapter Driver


